

How to Brew Balanced Coffee at Home: A Step-by-Step Guide
Table of Contents
- What Balanced Coffee Actually Tastes Like
- Understanding Your Coffee-to-Water Ratio
- Coffee Grind Size Guide for Different Methods
- Water Temperature and Extraction Time
- Step-by-Step Brewing Instructions
- How to Avoid Bitter Coffee
- How to Fix Sour Coffee
- Dialing In Your Balanced Brew
- Frequently Asked Questions
Last Updated: October 14, 2026
What Balanced Coffee Actually Tastes Like
To brew balanced coffee, you need a cup where no single flavor dominates. The sweetness, bitterness, and acidity work together instead of fighting each other.

Most people don't know what balance tastes like because they've never had it. A balanced cup feels smooth on your tongue. It has body without heaviness. The finish lingers pleasantly instead of leaving a harsh aftertaste.
Here's how to recognize it: take a sip and hold it for a moment. A balanced brew tastes clean. The flavor notes come through clearly. You might taste chocolate, fruit, or nuts depending on the bean's origin.
The opposite of balanced is obvious once you taste it. Over-extracted coffee tastes bitter and thin. Under-extracted coffee tastes sour and weak. Balanced coffee splits the difference perfectly.
At God's Country Coffee Co., we roast to order specifically to preserve the balance that develops during the first few weeks after roasting. Fresh beans make balance easier to achieve because they have more flavor compounds still intact.
Understanding Your Coffee-to-Water Ratio
The coffee-to-water ratio is the foundation of balanced brewing. Get this wrong and no other adjustment fixes the cup.
Most home brewers guess. They eyeball the grounds and hope. This is why their coffee tastes different every time.
A balanced ratio typically falls between 1:15 and 1:17 (one part coffee to 15-17 parts water by weight). This range works for most brewing methods. Some methods shift slightly, but this is your starting point.
Why weight instead of scoops? A scoop of ground coffee varies wildly depending on grind size and how packed it is. A scale removes the guesswork.
Start with 1:16. Brew 20 grams of coffee with 320 grams of water. Taste the result. If it tastes thin or sour, increase the coffee to 1:15 next time.
Record what you do. Write down the ratio, brew time, and how the cup tastes. After three or four brews, you'll see the pattern. You'll know exactly which ratio works for your palate and your beans.
| Ratio | Coffee Amount | Water Amount | Taste Profile |
|---|---|---|---|
| 1:15 | 20g | 300g | Stronger, fuller body |
| 1:16 | 20g | 320g | Balanced (starting point) |
| 1:17 | 20g | 340g | Lighter, more delicate |
Coffee Grind Size Guide for Different Methods
Grind size controls how fast water moves through the grounds. Finer grinds slow water down. Coarser grinds let water flow quickly.
The wrong grind size ruins even good beans. Too fine and the water sits too long, pulling out bitterness. Too coarse and the water rushes through, leaving sourness behind.
Coarse grind works for French press and cold brew. The long steeping time needs a coarse grind so water doesn't over-extract. Think sea salt texture.
Medium grind is for drip machines and pour-over. Water passes through at a moderate speed. This is where most home brewers should start. Think sand texture.
Fine grind is for espresso and AeroPress. Water moves quickly under pressure or through a small chamber. Think powdered sugar texture.
The problem: many coffee grinders produce inconsistent particle sizes. Cheap burr grinders leave some grounds too fine and others too coarse.
A consistent grind size matters more than hitting a perfect texture. If your grinder produces mostly medium particles with some variation, that's fine.
Water Temperature and Extraction Time
Water temperature controls extraction speed. Hotter water extracts faster. Cooler water extracts slower.
The ideal range is 195-205°F (90-96°C). Just below boiling works for most methods. Boiling water (212°F) is too hot and pulls out excessive bitterness. Water below 190°F leaves the cup sour and weak.
If you don't have a thermometer, wait 30 seconds after the kettle boils. This cools the water to roughly the right temperature.
Extraction time varies by method:
- Pour-over: 2.5-4 minutes
- French press: 4 minutes
- AeroPress: 1-2 minutes
- Drip machine: 5-10 minutes
These times are starting points. The actual extraction time depends on your grind size and ratio. Finer grinds extract faster. Coarser grinds need more time.
Temperature and time work together. If your coffee tastes sour, it's under-extracted. You can fix this by raising water temperature, using a finer grind, or brewing longer. If your coffee tastes bitter, it's over-extracted. Lower the temperature, use a coarser grind, or brew shorter.
The balance point is where the cup tastes clean, sweet, and smooth. Finding it takes a few tries. Once you find it, write it down.
Step-by-Step Brewing Instructions
Pour-Over Method
Pour-over is the most forgiving method for beginners learning to brew balanced coffee. You control every variable directly.
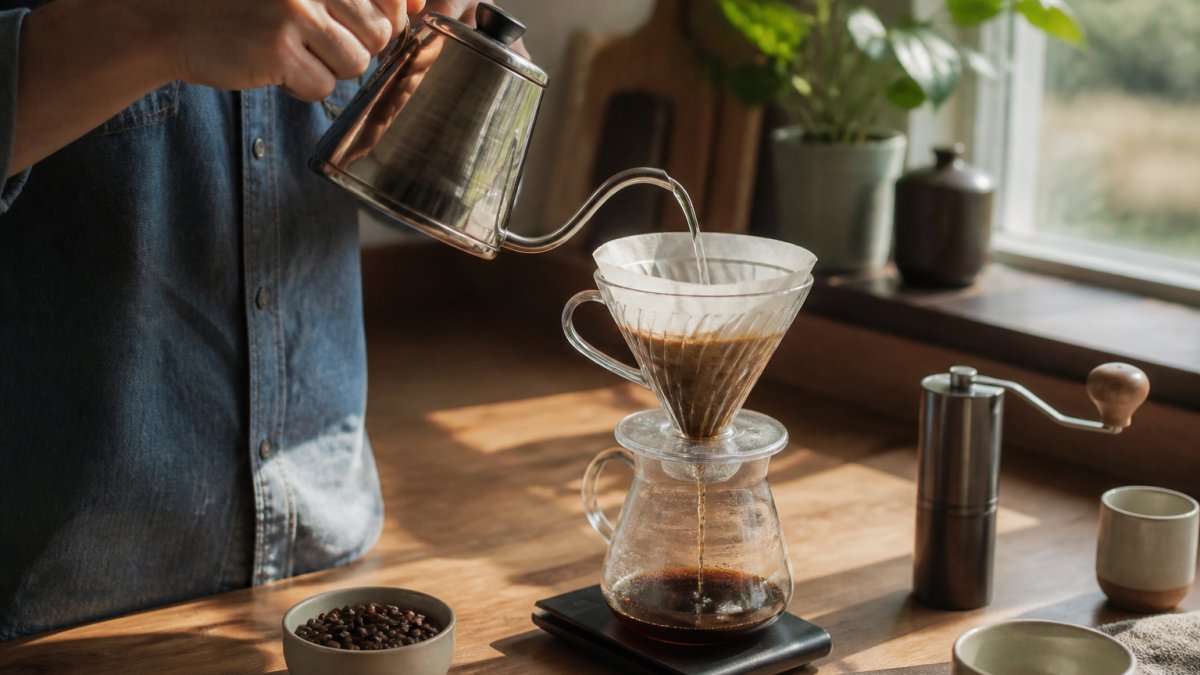
What you need:
- A pour-over dripper (Chemex, V60, Melitta, or similar)
- Paper or metal filter
- A kettle (gooseneck kettle helps, but any kettle works)
- A scale
- Whole bean coffee
- Grinder
Step 1: Prepare your equipment. Place the filter in the dripper and rinse with hot water. This removes paper dust and preheats the dripper. Discard the water.
Step 2: Measure and grind. Weigh 20 grams of whole beans. Grind to medium size (think sand). Pour grounds into the filter.
Step 3: Bloom the grounds. Pour just enough hot water (195-205°F) to wet the grounds. Wait 30 seconds. This releases CO2 trapped in the beans and improves extraction.
Step 4: Pour slowly. Pour the remaining water in a circular motion. Pour should take 2-3 minutes total. The goal is steady flow, not fast or slow.
Step 5: Wait for drip to finish. Total brew time should be 3-4 minutes. If it's faster, your grind was too coarse.
Step 6: Taste and adjust. Does it taste balanced? Sweet and smooth? Make notes. Next time, adjust grind size or water temperature based on what you tasted.
French Press Method
French press is simple but demands precision. One mistake and the cup becomes muddy or sour.
What you need:
- A French press (any size)
- A kettle
- A scale
- Whole bean coffee
- Grinder
- A timer
Step 1: Preheat the press. Pour hot water into the empty press. Let it sit for 30 seconds. Discard the water.
Step 2: Measure and grind. Weigh 20 grams of beans. Grind coarse (think sea salt). Pour into the preheated press.
Step 3: Bloom. Pour just enough hot water to wet the grounds. Wait 30 seconds.
Single Origin Favorites Sample Pack →
Step 4: Pour to full. Pour remaining hot water slowly. Fill the press completely.
Step 5: Steep for 4 minutes. Set a timer. French press needs exactly 4 minutes. More time pulls out bitterness. Less time leaves sourness.
Step 6: Press slowly. Push the plunger down steadily over 20-30 seconds. Pressing too fast creates sediment in your cup.
Step 7: Pour immediately. Don't let the coffee sit in the press after pressing. Pour into your cup right away.
AeroPress Method
AeroPress is fast and forgiving. It brews balanced coffee in under 2 minutes.
What you need:
- An AeroPress
- A filter (paper or metal)
- A kettle
- A scale
- Whole bean coffee
- Grinder
Step 1: Assemble and rinse. Put a filter in the basket. Rinse with hot water.
Step 2: Measure and grind. Weigh 15 grams of beans. Grind medium-fine (between pour-over and espresso).
Step 3: Add grounds. Place the AeroPress over your cup. Add grounds to the chamber.
Step 4: Bloom. Pour just enough hot water to wet the grounds. Wait 30 seconds.
Step 5: Fill and stir. Pour hot water to the top. Stir for 10 seconds to mix evenly.
Step 6: Press. Place the plunger on top and press down steadily. The entire press should take 30-40 seconds.
Step 7: Taste immediately. AeroPress brews fast and cools quickly. Drink right away.
How to Avoid Bitter Coffee
Bitter coffee comes from over-extraction. Water pulled too many compounds from the grounds.
Common causes of bitterness:
- Water too hot (above 205°F)
- Grind too fine
- Brew time too long
- Using old, stale beans
- Reusing grounds
The fix depends on what caused it. If your water is boiling, wait longer after heating. If your grind looks like powder, use a coarser setting. If you're brewing for 6 minutes in a drip machine, reduce to 5 minutes.
Old beans taste bitter even with perfect technique. Beans peak 2-4 weeks after roasting. After that, flavor compounds degrade and bitterness increases. This is why fresh, roasted-to-order beans from God's Country Coffee Co. make such a difference. You get the full window of peak flavor before bitterness takes over.
How to Fix Sour Coffee
Sour coffee comes from under-extraction. Water didn't pull enough flavor from the grounds.
Common causes of sourness:
- Water too cool (below 195°F)
- Grind too coarse
- Brew time too short
- Using very fresh beans (they need slightly longer extraction)
The fix is the opposite of bitter. Hotter water, finer grind, or longer brew time all increase extraction.
Start with water temperature. It's the easiest variable to control. If your cup tastes sour, heat your water hotter next time. If it still tastes sour after trying hotter water, make your grind finer.
Very fresh beans can taste sour because their cell walls are tight. They release flavor compounds slowly. Let fresh beans rest 3-5 days after roasting before brewing them. The resting period helps them open up and extract more evenly.
Dialing In Your Balanced Brew
Dialing in means finding the exact settings that produce a balanced cup with your specific beans and equipment.
This takes 3-5 brews. Each brew teaches you something.
Brew 1: Use the standard settings. 1:16 ratio, medium grind, 200°F water, standard brew time for your method. Taste it.
Brew 2: Adjust one variable based on what you tasted. If it was sour, make one change (hotter water, finer grind, or longer brew time).
Brew 3: Adjust again if needed. Keep changing one variable until the cup tastes balanced.
Brew 4 and beyond: Fine-tune. Once you have a balanced cup, small tweaks improve it further.
Write down every setting:
- Coffee weight
- Water weight
- Grind size setting
- Water temperature
- Brew time
- How it tasted
After five brews, you'll have a repeatable recipe. You'll know exactly how to make balanced coffee with those beans and that equipment.
When you switch to a different bean, start over. Different beans have different density and flavor compounds.
The goal is consistency. Once you dial in, you should get the same balanced cup every single time.
Brewing balanced coffee at home is learnable. It's not magic or talent.
The best part: once you dial in, the process becomes automatic. Our single-origin beans are roasted to order for maximum freshness, giving you the full window of peak flavor to dial in your perfect cup.

Frequently Asked Questions
What is the best coffee-to-water ratio for home brewing?
The standard coffee-to-water ratio is 1:16 (one part coffee to 16 parts water by weight). This translates to roughly 1 gram of coffee per 16 grams of water, or about 0.6 ounces per cup. Start with this ratio, then adjust based on taste: use less coffee for a lighter cup, more for stronger flavor. Weighing your coffee and water produces more consistent results than measuring by volume.
How does grind size affect the taste of brewed coffee?
Grind size controls how quickly water extracts flavor from the grounds. Finer grinds expose more surface area, speeding extraction and producing stronger, sometimes bitter coffee. Coarser grinds slow extraction, risking sour, weak coffee. Match your grind to your method: coarse for French press, medium for pour-over, fine for espresso. Adjust grind size when dialing in your brew.
How do I make coffee taste balanced instead of bitter or sour?
Balanced coffee has sweetness, acidity, and body in harmony. Bitter coffee typically comes from over-extraction (too fine a grind, too hot water, or too long steeping). Sour coffee results from under-extraction (too coarse a grind, water too cool, or too short a brew). Start with the 1:16 ratio, medium grind, and water just below boiling. Taste your brew and adjust one variable at a time.
What water temperature should I use to brew balanced coffee?
Water between 90-96°C (195-205°F) works best for most home brewing methods. Water that is too hot can over-extract and create bitterness; water that is too cool under-extracts and leaves the coffee tasting sour or weak. If your kettle doesn't have a thermometer, let boiled water cool for 30 seconds before pouring. Fresh, filtered water also improves flavor consistency.